Tuesday, August 20, 2013

Sparge Arm & HERMS

One of the goals of my new setup was to be able to heat my mash either by direct or indirect method in order to perform different mash steps. Since my setup is three keggles, it would be very easy to do a HERMS and would not require much more effort since I already have an immersion chiller which I made from 50' of 1/2" copper tubing and 1/2" MPT connections. I used MPT or FPT connections on every piece of equipment just in case I ever needed to swap a component out; makes life easier rather than trying to un-solder a component.

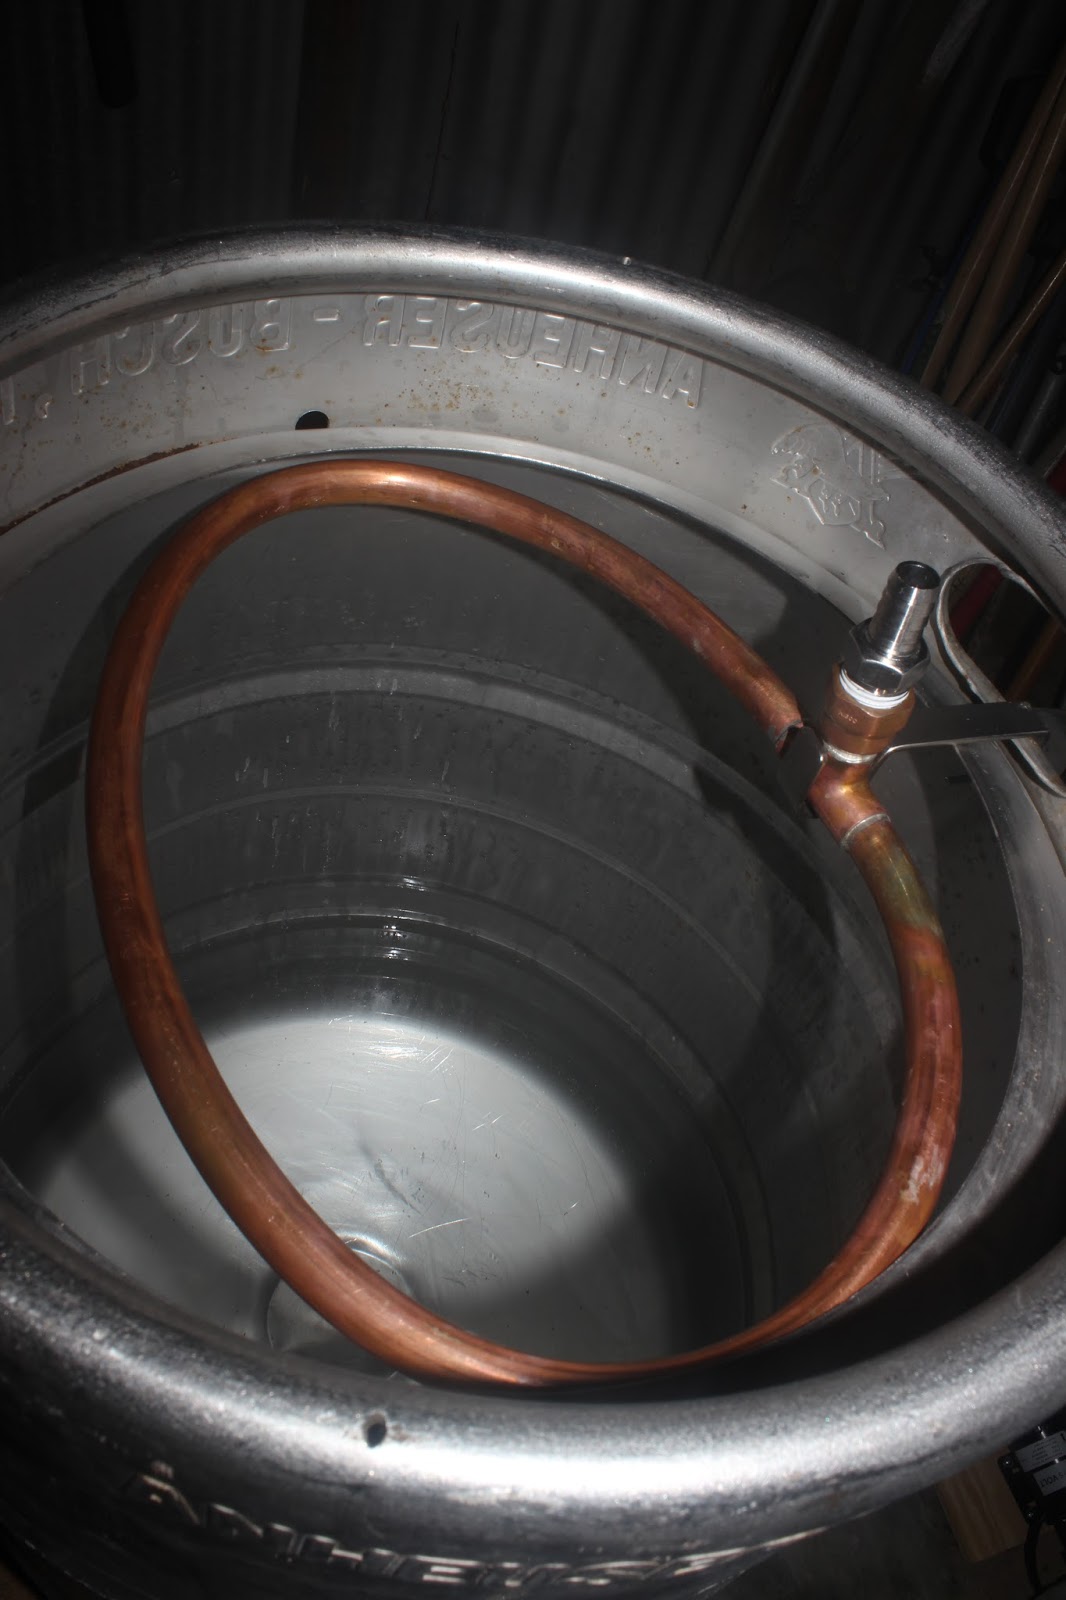
I had a piece of 1/2" copper tubing left over from making a whirlpool attachment so after a quick run to HomeDepot to purchase a T adapter and 1/2" FPT adapter. After a bit of bending, soldering and drilling:


I initially was going to let the sparge arm rest on the kegggle top but quickly found out that was going to be a pain in the arse and it wouldn't stay in place unless I used a clamp to hold it on securely. After looking around the shop a bit, I found a solution!


An old curtain rod hanger works perfect!


I only needed to drill one hole in the keg to support it. Placing the sparge arm in the hanger at the base of the T creates a snug fit.


The sparge arm is a little wider than the opening of the keg which helps hold the arm in place as well.

For the HERMS, now all I have to do it place my immersion chiller in my HLT and run a jumper hose from the immersion chiller outlet to the sparge arm. To make life a bit easier, I also replace the inlet on the immersion chiller with a camlock in order to make a connection to my chugger pump.


Tuesday, August 13, 2013

ESB, First Attempt

This was brewed on 8/11/2013

Since my kegs are currently empty, it is probably wise to brew an ale while all the other sours and lagers are fermenting away. Dry kegs make me sad... I am still trying to dial in my system and for the first time, felt like I actually got things right! The brew day was pretty uneventful except for not getting a cam-lock on properly while doing the boil recirculation for the whirlpool. Boiling wort all over your hands and feet will make you curse all of the gods...

Ingredients:

Grains:
11 lb - Riverbend Heritage Malt
8 oz - Aromatic Malt
8 oz - Crystal 40L
8 oz - Melanoiden Malt
4 oz - Crystal 120L
4 oz - Special Roast

Hops:
2 oz - EKG @ 60 min
.5 oz - EKG @ 20 min
.5 oz - EKG @ 1 min

Yeast:
White Labs WLP002 - English Ale

Misc:
1 gram Calcium Chloride
2 grams Chalk
5 grams Gypsum

Mash at 154F for 60 minutes
Boil for 60 minutes

OG (measured): 1.054

Started fermentation at 62F. Thanks to the guys from the CarboyJunkies on the fermentation temperature recommendation. Fuller's will start their fermentation at 63F before raising to 68F and then will lowered back down.

http://byo.com/stories/issue/item/2318-fuller%E2%80%99s-the-pride-of-london

8/16/2013 Update:

Took a small sample of the beer and it is reading 1.018. I cranked the temp up to 69F and roused the yeast. I am looking for a FG of 1.016.

8/23/2013 Update:

Kegged the ESB this afternoon. I did a refractometer reading and it measured 7.7 brix. Doing a brix FG calculation, it started at 13.5 brix which means the FG equals 1.015. Just to be sure, I took a hydrometer reading and sure enough, 1.015! Im always OCD about reading and not trusting them but I now, finally, have 100% confidence in my refractometer.

Monday, August 12, 2013

Oktoberfest!

It's that time of year! Time to say goodbye to summer and hello to football season! There is not much better than watching football with a slight crisp breeze in the air while eating freshly made soft pretzels and washing them down with a nice Oktoberfest. I am a big fan of the German Oktoberfest but that's not to say I do not also enjoy some of the American versions as well. The joy of seeing Sam Adams Oktoberfest hit the shelves means summer is coming to an end. This year I got a late start on my Oktoberfest as we were traveling around Europe for our honeymoon. I would have preferred to brew this in June instead of the first of August. Oh well.

Ingredients:

Grains:
8 lb - Vienna Malt
3 lb - Munich Malt

Hops:
2 oz - Hallertauer @ 60 min

Yeast:
Wyeast #2633 Octoberfest Lager Blend

Misc:
1 gram Chalk added into the mash.

Mash at 154F for 60 minutes
Boil for 90 minutes

OG (measured): 1.056

I started fermentation at 49F and after a week, slowly stepped the temp up to 64F. It will need a little more time for the diacetyl rest to clean up and then it will be time to transfer to lager.


Wednesday, August 7, 2013

Riverbend Malt

One of the great things about being in a homebrew club is learning about new things from other members of the club and being introduced to these great finds. A couple in the club were gracious enough to put together a group grain buy from Riverbend Malt House in Ashville, NC. Riverbend provides artisan malts to local breweries in the Ashville area and also contracts with local farmers who grow their barley, wheat and rye.


Riverbend uses 6-row Thoroughbred barley for their base malts which provides a higher protein content than 2-row varieties.  6-row is also not as "plump" as the comparable 2-row varieties but this also varies due to farmer conditions (rainfall amounts, soil nutrients, etc..).


I grabbed a bag of Pilsner and a bag of Heritage malt. Riverbend on their Heritage variety:

This 6-row malt is produced from Thoroughbred barley grown in near Salisbury, NC. It makes the perfect base malt for a variety of darker styles, such as a Vienna Lager, German Alt or California Common. It has a more pronounced flavor and aroma profile than our Pale Malt, which contributes a slight nutty flavor, but allows the specialty grains to take center stage.

Lovibond: 6-7
DP: 65

Suggested Usage: 5-95%

I'm looking forward to brewing with the Heritage malt and will try to come up with a beer recipe that really showcases this base malt. 

Monday, August 5, 2013

Sour Mash Berliner Weisse #2


This is my second attempt at a sour mash Berliner Weisse beer with a few adjustments to the original version. I wanted to bring the wheat percentage up in this recipe to increase the beady characteristics which are prevalent in this style. Along with the increase in wheat, I also changed to Wyeast 1272 because I was lazy and didn't want to drive 20 minutes to purchase a vial of WLP001. Acidulated malt amount remained the same but more on that later.

Ingredients:

3.5 lb - Pilsner
2.5 lb - Wheat
8 oz - Acidulated Malt
1 oz - Williamette Hops @ 15min
Wyeast 1098

My mash was a bit different this go around as well. I dropped the mash temp down to 149F and let it rest for ~80 minutes to ensure I achieved full conversion. Berliner Weisse beer styles typically run in the pH range of 3.2 - 3.4 of the finished beer due to the lactic acid production and low mash pH. To reach this pH level, the addition of the Acidulated Malt helps to reduce the pH of the mash and gives the lactic acid an environment suitable to grow in. According to Weyermann, Acidulated Malt should reduce the pH of the mash by 0.1 per 1% addition of Acidulated Malt to the grain bill. To test this I mashed in and let the mash rest for 5 minutes before taking a pH reading. My normal mash pH is 5.2 - 5.4 depending on the grain but since this is all base malt, I would say the mash should have been at 5.2 level without the Acidulated Malt addition. Since I added 8oz of Acidulated Malt, this should have reduced my mash pH by 0.8.. Quick math here: 5.2 - 0.8 = 4.4 pH. My pH meter reads 4.37 pH.. that's close enough! 


After the mash was complete, I dropped the temperature down to 105F by adding ice and then covered with plastic wrap to cut down on the oxygen being in contact with the mash. Added heating pad and temperature probe and we will see how it comes along in a few days. 


8/7/2013 Update:

Took a pH reading this afternoon and it clocked in at 3.42 pH. Since the style's pH range is 3.2 - 3.4, I decided to go ahead and drain the mash instead of waiting another 24 hours to finish the brew and running the risk of it being too sour. 

BeerSmith calculated my sparge water volume to be 2.5 gallons but my final collected wort gravity was 1.042! The pre-boil estimate was 1.026! Holy smokes! I added another gallon of water to bring it down to 1.033. 

Boiled the wort for 20 minutes with a 15 minute hop addition of 1oz Willamette hops. 

8/12/2013 Update:

Sampled some of the beer tonight and it shows promise of being a fantastic beer. It is not over powering sour like the first attempt. The nose gives you the idea of it being sour but the fumes do not hit you in the back of the throat. The taste is sour but very earthy at the same time (grass and minerals). Again, not overly sour this time and is more balanced than before. It seems to need another 5 or so days in the primary to clean up.